cubeSavvy web-based Essbase grids: beta 9.6 – add attribute dimensions

I’ve been on vacation for the past 2 weeks, hence the lack of development/posts. I have had time, however, in the day since I’ve been back to add a requested feature – the ability to add attribute dimensions to an ad-hoc grid. Intuitively, only attribute dimensions that are not currently on the grid will be added.

Here you can see an ad-hoc grid that doesn’t contain attribute dimensions, along with the new “Insert Attributes” button on the toolbar:

ad-hoc grid before attribute dimensions added with new toolbar button

After clicking “Insert Attributes”:

ad-hoc grid with attribute dimensions after clicking new toolbar button

Even those of you who aren’t interested in this feature will want to download this last release, since the license file in the prior version has expired and will no longer allow you to use the program.

The production release of cubeSavvy is still on-target for August. This is primarily due to the ongoing positive feedback received from beta testers, including in-person at Kscope in Chicago a few weeks ago. I really appreciate it, so please keep your comments and suggestions coming!

Posted in cubeSavvy Tagged with: ,

cubeSavvy web-based Essbase grids: beta 9.5 – users can now create & share ad-hoc

version 6.0.0 BETA 9.5

Enhancements and improvements in this release and BETA 9.

  • Added ability for users to create ad-hoc grids.
    • Users no longer need to wait for an admin to create an ad-hoc grid for them. They can do so directly from the Home tab, using the ‘New Adhoc grid’ option.
    • Users can also edit and delete ad-hoc grids to which they have access.
  • Improvements made to Environments management when creating/editing grids.
  • Now only grids to which users have access are displayed in the Grids list on the left. As a reminder, there are three ways a user can have access to a grid:
    1. Through direct access given by an admin on the Users tab
    2. Through membership in a Shared Services group that has been assigned to a grid by an admin
    3. Through creating an ad-hoc grid themselves using the new functionality above
  • Added ability for users to share ad-hoc grids with other cubeSavvy users. I’m finally getting to some of the features I’ve been looking forward to creating since I started this project. Most of the features till this release have been recreating (and improving) functionality that Smart View already has. However, this ability to collaborate by sharing grids is something that you can’t easily do in Excel, and hence in Smart View.Share grid button

cubeSavvy will remain in beta for a little while longer to make sure that it’s as stable and fast as possible. I’m tentatively targeting August for the 6.0.0 production release.

I’ll be at KScope in Chicago in a couple of weeks. Please find me and say hi!

Posted in cubeSavvy Tagged with: ,

cubeSavvy web-based Essbase grids: beta 8 – run calc scripts on ad-hoc submit data

Enhancements in this release:

Ability to run calc scripts on ad-hoc grids after Submit Data.

This functionality is the same as for MDX and Report Script grids: all the members for each dimension are passed to the report script, allowing for super-focused calculations/aggregations. Click on FAQ on the Home tab for more details, and an example.

I’ll walk through a simple example.

First, select a calc script:

edit grid to select adhoc calc script

The “subs1” calc script above:

subs1 calc script attached to adhoc grid

Note the use of @IL and @L member selection commands. These take a @LIST (since there can be multiple members), which is passed in from the cubeSavvy grid on submit.

Data has been entered in an ad-hoc grid below, but has not yet been submitted (Submit Data).

entered data in grid but not submitted

After clicking Submit Data on the grid above, we can see that data has been aggregated:

calculated data after submit on adhoc grid

The Essbase log for our application (Sample_U.Basic) gives us the full details:

Sample_U.Basic log file showing our focused calc from adhoc grid

And we can get detail that the Essbase log fails to provide by looking at the “Data Updates” tab on the cubeSavvy Home page. Here we can see the full Member Intersection, along with the Old Value and New Value for each data point:

Data Submits screen showing submitted data and calc script run

Added Dataless Navigation

Improved administration of multiple Essbase environments

It’s now much easier to add/edit/delete Essbase environments, directly from the Home page. The “default_configuration” below is the one set up in the installer. You can edit or delete it as you would any other environment. However, there must always be at least one environment. If you delete them all, the “default_configuration” will be added back the next time you start (start.bat/start.sh) the application.new environments management screen

I’ve decided to keep cubeSavvy in beta for a little while longer to make sure that it’s as stable and fast as possible. Your feedback is still shaping the product. Please keep it coming!

Posted in cubeSavvy Tagged with: ,

cubeSavvy web-based Essbase grids: beta 7 – multiple Essbase environments

There are several small bug fixes and enhancements in this release. The major enhancement is the ability to add multiple Essbase environments for ad-hoc grids. Prior releases only allowed connecting to a single Essbase server/Provider services combination. That limitation has now been lifted.

  • Here’s an excerpt from the cubeSavvy.conf file: The ‘default’ environment below is used to test whether a user has Essbase access to even log into cubeSavvy. The user should be provisioned in its Shared Services instance. The names are important (e.g. dev, test, main) since this will be displayed on grids. You can add as many environments as needed. At least one, however, is required as the default.cubeSavvy.esbEnvironments {
    default: prod,
    dev {esbServer = "epmDev", esbProviderUrl = "http://192.168.56.101:9000/aps/JAPI"},
    test {esbServer = "epmTest", esbProviderUrl = "http://192.168.56.102:9000/aps/JAPI"},
    prod {esbServer = "epmProd", esbProviderUrl = "http://192.168.56.103:9000/aps/JAPI"}
    }
  • By default the installer will prompt for, and fill in, the “main” environment values, like so:
    cubeSavvy.esbEnvironments {
    default: main,
    main {esbServer = "epmMain", esbProviderUrl = "http://192.168.56.103:9000/aps/JAPI"}
    }
    To add additional environments, as above, you will need to manually edit the $INSTALL_DIR/cubeSavvy/conf/cubeSavvy.conf file.

This enhancement was requested by so many people, I decided to release one more beta to incorporate it.

Grid edit/setup:

environment now on grid edit tab

Prompt to log into environment when clicking on grid (only displays if you’re not already logged into the particular environment):

environment login prompt

Environment indicated on ad-hoc grid:

environment indicator on grid

Posted in cubeSavvy Tagged with: ,

cubeSavvy web-based Essbase grids: Beta 6 – 3 big enhancements

Several enhancements have been implemented in this release:

  • Control double-clicks have been replaced by normal double-click functionality. Control double-click was deemed necessary because double-clicking on a cell was one of the few ways to edit the contents. Now that double-clicking performs a zoom, there are several ways to enter edit mode in a selected cell:
    • A formula bar, similar to the one in Excel, has been added. After clicking on a cell, its value will be displayed here for editing.
    • Just start typing.
    • Press the F2 key.
  • Export to Excel. Clicking on this button will export the currently-displayed grid to a CSV file, which can be opened in Excel.
  • Improvements to the Member Selection screen. Right clicking on a member in the outline on the left-hand panel now presents a menu of member selection commands (Children, Descendants, Level 0, Ancestors). Choosing one of them will apply the command to the selected member and add the resulting members to the Members Selected panel on the right. Members can be removed from the Members Selected panel on the right simply by double-clicking on them. Clicking the Save button will add these members to your grid at the selected cell.

This might well be the final beta before the production release. Testers have reported impressive stability and usability in a wide range of environments.

Please let me know your thoughts about cubeSavvy. Download at the usual spot.

Posted in cubeSavvy Tagged with: ,

cubeSavvy web-based Essbase grids: Beta 4 – more options

The following features were implemented for Beta 4:

  • Undo/Redo. In theory, the number of these operations is unlimited. In practice, browser memory is the limiting factor.
  • Display both member names and aliases on retrieves. The alias displayed is determined by the selection in the dropdown next to “Name & Alias”, “Default” in this case.

member names and aliases in retrieve

  • Choose #Missing text label or numeric value. The retrieve above with #NumericZero selected:

numeric zero instead of #Missing

  • Select indentation level: subitems, totals, or none. The retrieves above have “Indent None” applied. Previously, all retrieves used “Indent Subitems” exclusively. That remains the default, just as in the classic add-in and Smart View.

Please continue to provide your feedback. It really does let me know what I should work on next. So download Beta 4 and let me know what you think.

-Harry

Posted in cubeSavvy Tagged with: ,

cubeSavvy web-based Essbase grids: Beta 3 – double clicks

version 6.0.0 BETA 3 Highlights

  • Implemented mouse actions, such as control button+double-clicking to zoom in and control+right double-clicking to zoom out. You have to press the control button (Ctrl on Windows) while double-clicking. This is necessary because plain double-clicking on a cell opens it for editing.
  • The first iteration of member information and member selection has also been included for testing.
  • Licensing. There is now a license.sec file under the conf directory. This file must be present, and valid, for cubeSavvy to start. For the beta, it allows 30 days of use for up to 10 users.

cubeSavvy double click adhoc operationsThe member information screen is pretty similar to the ones in the classic add-in and Smart View:

member information screenThe member selection screen is still a work-in-progress, but is functional. For example, the Search field currently only finds matches for members that are already displayed. It doesn’t yet go back and search the database for other potential members that also match the entered criteria. That will be included in the next beta release. You might also wonder why the Alias column is showing Russian below. That is because the alias table chosen on the grid is RussianNames – you can see it in the background:

member selection screenSince I’ve now implemented the licensing functionality, I’ve decided to open up the beta to everyone. Therefore, I’ve made the beta 3 version the main cubeSavvy download.

Please let me know what you think in the comments.

-Harry

Posted in cubeSavvy Tagged with: ,

cubeSavvy installation & configuration

Following are instructions for downloading and installing cubeSavvy (including the cubeSavvy web-based add-in).

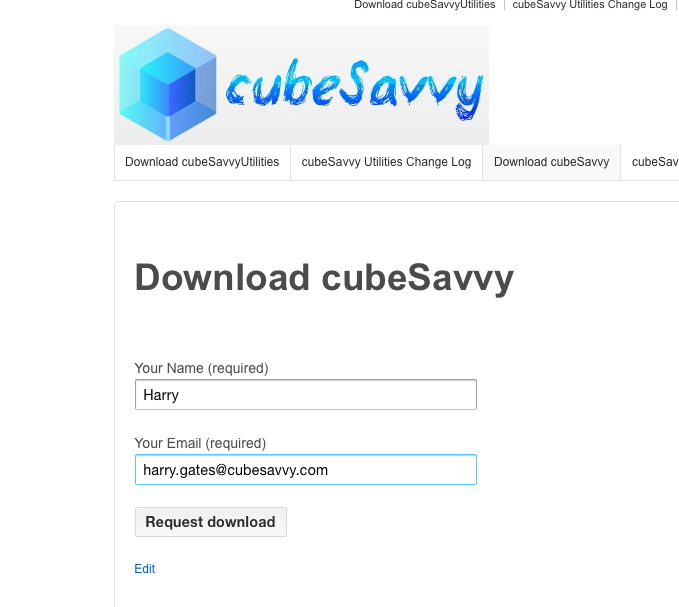
First, go to the download page at https://www.cubesavvy.com/download-cubesavvy/.

download page for cubeSavvy

You will receive an email response that contains a download link that expires in one hour:

cubeSavvy email with download link

Click on the download link in the email and save the file:

cubeSavvy jar file

You can then double-click on the cubeSavvy.jar file. If you have Java installed, you will see the cubeSavvy installer welcome screen:

cubeSavvy installer welcome screen

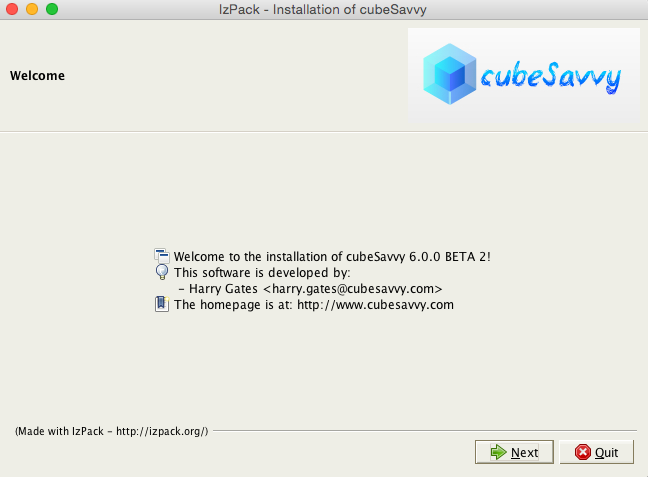
Click Next. The cubeSavvy Software License will be displayed:

installer license screen

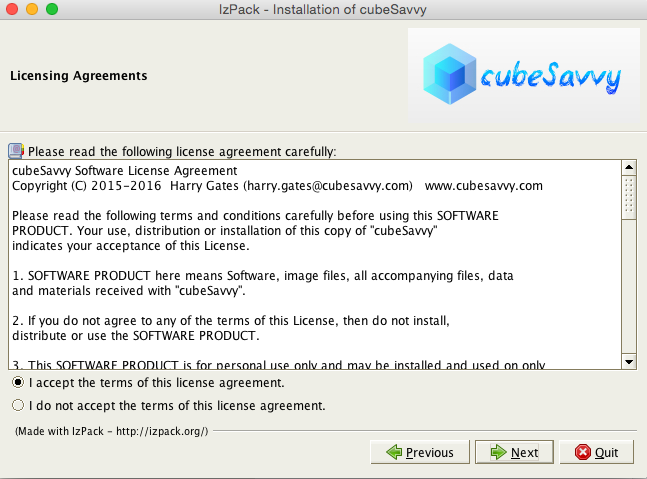
Accept the license terms in order to continue, by clicking Next. The Target Path page will be displayed, allowing you to Browse for, and select, an installation directory. I highly recommend not choosing a path that contains spaces, e.g. “My Documents”, as this can create issues on Windows.

installer select installation path


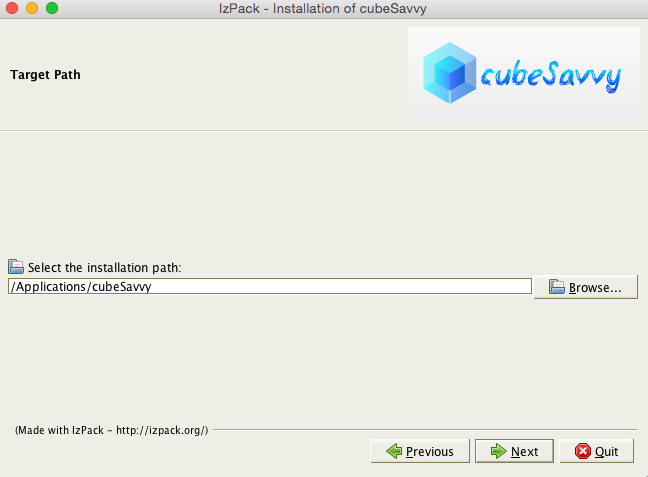
You can enter a new path in the field above and it will create the indicated directory structure: create target directory

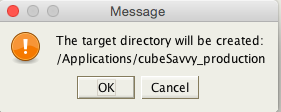
Now we get to the most important part – the configuration screen:

installer configuration screen

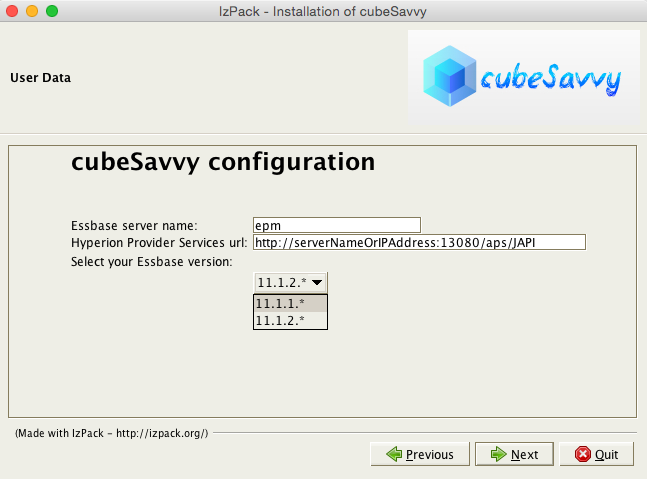
  • Essbase server name. Enter the name of your Essbase server.
  • Hyperion Provider Services url. In a production installation Provider Services (APS) will normally be installed on a different server than Essbase. You can verify that you have the correct url by entering it in your web browser. You should see a message like this: Provider Services url message
  • Select your Essbase version. Select the option representing your version of Essbase. There are differences in how the two major releases handle certain functions. If cubeSavvy throws strange error messages, you may want to run back through the installer and make sure you select the correct version.

Click Next and you’ll be presented with the Processing screen:

installer processing screen

As the name implies, this screen performs certain necessary processing. It requires no user input, so you can select Next upon its completion.

Congratulations! You’re done. Installing cubeSavvy is that easy.

installation finished

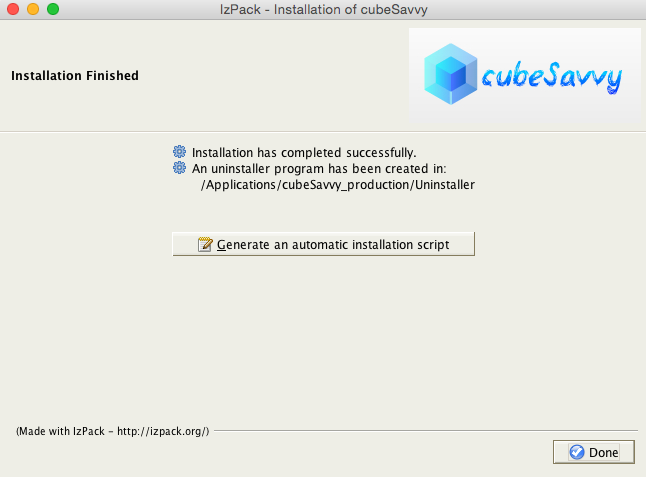
After clicking Done, you can navigate to the directory in which you installed cubeSavvy in the third screen (Target Path) of the installer above. In this case, I selected /Applications/cubeSavvy_production. Here you can see cubeSavvy’s directory structure:

installation directory

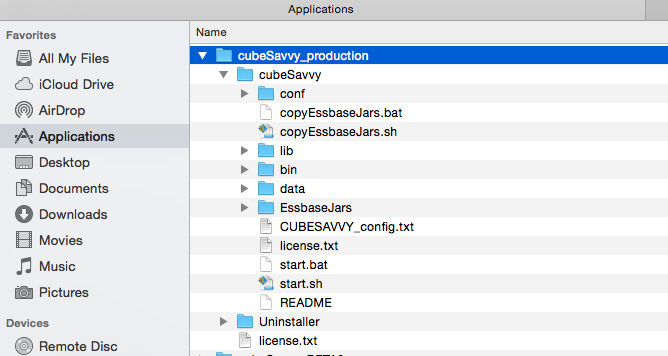
The main files of interest are start.bat (all version of Windows) and start.sh (Linux/UNIX/Mac). If you’re on Windows, the CUBESAVVY_config.txt will be of interest:

CUBESAVVY_config.txt

Here’s a good explanation of the Xms and Xmx Java flags: “The flag Xmx specifies the maximum memory allocation pool for a Java Virtual Machine (JVM), while Xms specifies the initial memory allocation pool. This means that your JVM will be started with Xms amount of memory and will be able to use a maximum of Xmx amount of memory.” The default entries above mean that the JVM will start with 512MB of memory and will allow cubeSavvy to use up to 2048MB, or 2GB, of memory. If you are running cubeSavvy on a powerful server, you will likely see performance gains on large queries and retrievals by increasing the Xms and Xmx numbers from their defaults. If you’re not running Windows, you can set the same options in start.sh:

start.sh config file for non-Windows systems


Posted in cubeSavvy Tagged with: , ,

cubeSavvy add-in: beta update – Submit Data implemented

I’ve implemented Submit Data functionality for the second beta version, to be released tomorrow.

cubeSavvy add-in Submit Data functionality implemented

It also incorporates the feedback I’ve received from the current beta testers. The most common item mentioned has been to increase the number of rows in a retrieve from the current 20,000 limitation. I’m glad to announce that there is no limit now, besides the one imposed by Provider Services. And, in keeping with my focus on speed, performance is excellent, exceeding that of both Smart View and the classic add-in for large retrieves.

I’ve also finished perfecting the Save Changes option, to allow changes made to the grid during ad-hoc retrieval operations to be saved:

If you’d like to test the beta, please let me know and I’ll make it available to you. I’ll be sending out an update to the current beta testers tomorrow.

Posted in cubeSavvy Tagged with:

cubeSavvy – add-in: beta this weekend

Just a short post, since I’m currently spending all of my limited free time working on development.

I’m shooting for releasing the first beta version of the cubeSavvy web-based Essbase add-in to testers this weekend. As a reminder, this version will only have retrieval capability. Ability to save data will come in the next beta release. Speed has been the major focus, and compares favorably to Smart View, and in some cases exceeds that of the classic add-in.

Please send me an email if you’d like to help test.

In the meantime, here’s another brief video demonstrating basic functionality:

Posted in cubeSavvy Tagged with: ,